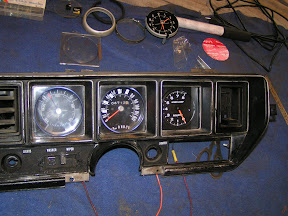
 Yesterday I was determined to get the clock to tachometer conversion done. I had planned it all out in my head and knew exactly how I wanted to do it.
I had bought a clear plastic sheet about 2 millimeters (mm) thick as well as some black, semi-gloss paint, the rest of the tools needed for the fabrication should be available in the garage.
I had already disassembled the clock and tach a week ago so I started out by measuring where the new holes was going to end up. After I created a template it was quite easy to mark and drill the holes.
Now I needed to figure out how much the old spacers in the tach had to be cut down in order to fit behind the plastic cover. 10 mm had to come off but it turns out that the inner threads for the fastening screw didn't run all the way down so I had to find a new solution.
Reijo suggested using old fuel line copper tube cut down to 8 mm (the original rise of the existing spacers were 18 mm). This worked out great and after clamping the copper tube to the screws the spacers even stayed put when installing the unit into the old housing.
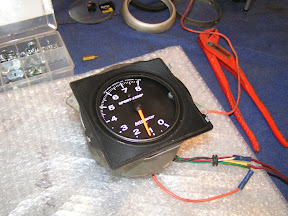
 Next up was to fabricate a new black cover since the tach was smaller than the clock. Again Reijo chimed in and came up with the idea to reuse the cover ring from the Autometer housing in order to create a very nice looking cover.
The only complication with this idea was that the rev limiter lamp sticks out a bit which meant that I had to mount the inner cover ring "inside out". Not a big deal, it's just a less snug fit against the face of the meter. After a couple of quick layers of paint I then secured the ring to the outer cover with some glue.
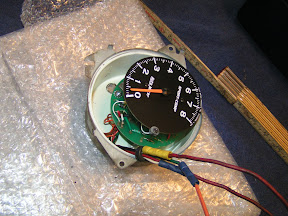
Here's the unit without the plastic cover. Speaking of which, the plastic cover was the next thing on the list.
 I traced the outline from the old cover (which I couldn't use for two reasons; it was concave, touching the needle, and it had a hole for the clock setting knob). It turned out that the plastic I had bought cracked far too easy and I had to scrap my first attempt.
Despite doing my best not to scratch or crack the second cover it still cracked almost everywhere. At least I avoided the scratches and it turns out that when the unit is mounted in the instrument cluster the cracks aren't visible. If I had more time I'd redo it until it's perfect but I have to settle with this as I do not have more time.
Still, not to bad for a days work if you ask me.

2 comments:
what kind of tool did you use to cut the plastic with?
A normal hacksaw (metallsåg). Perhaps a grinder or a Dremel would have worked better but I kinda ran out of time to try it a third time.
The plastic was so thin and brittle though that it'd most likely cracked no matter what tool I'd use.
Post a Comment